How I Made It: 2022 Pride Gown
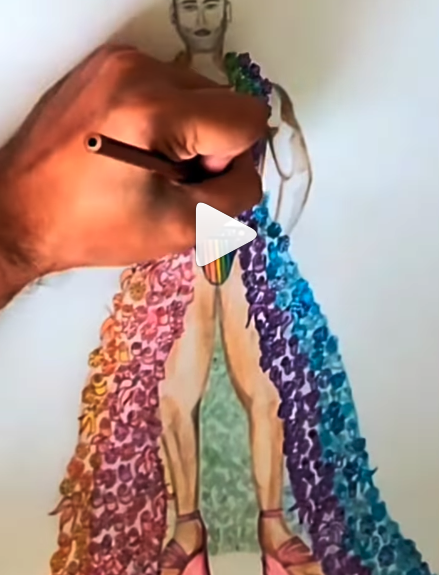
I began my floral dress journey a year ago, still riding high from my jeweled gown extravaganza. About two weeks after Pride, a few concepts flew out of me. All of these are timestamped July 2021:
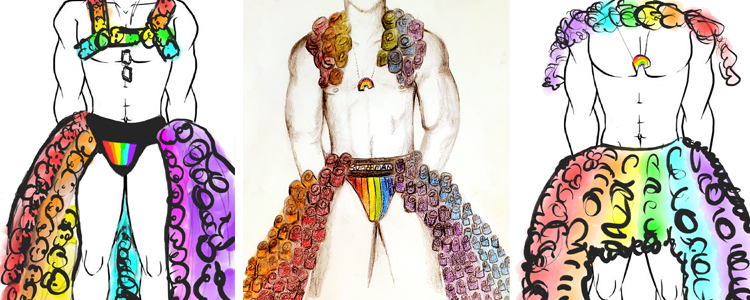
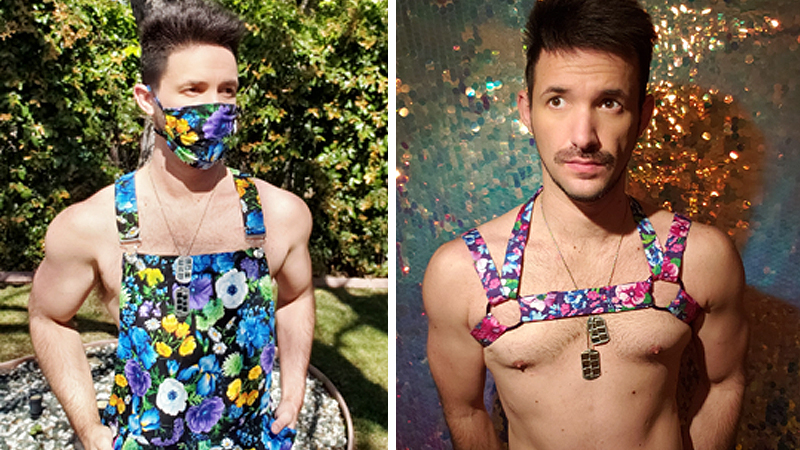
People always ask my inspiration and how long it took me to make something— I never have a clear answer for either question. It’s possible this year’s concept invaded my brain and grew after seeing an applique harness at Juanita More’s party last year. Then again, I had been making my own floral harnesses since 2019, and added in floral overalls, hoods, and shorts, too. By that metric, you could say this dress was three years in the making, influenced by many customers asking “when are you going to sell jockstraps,” and layering on it that I had recently begun making large, poofy skirts.
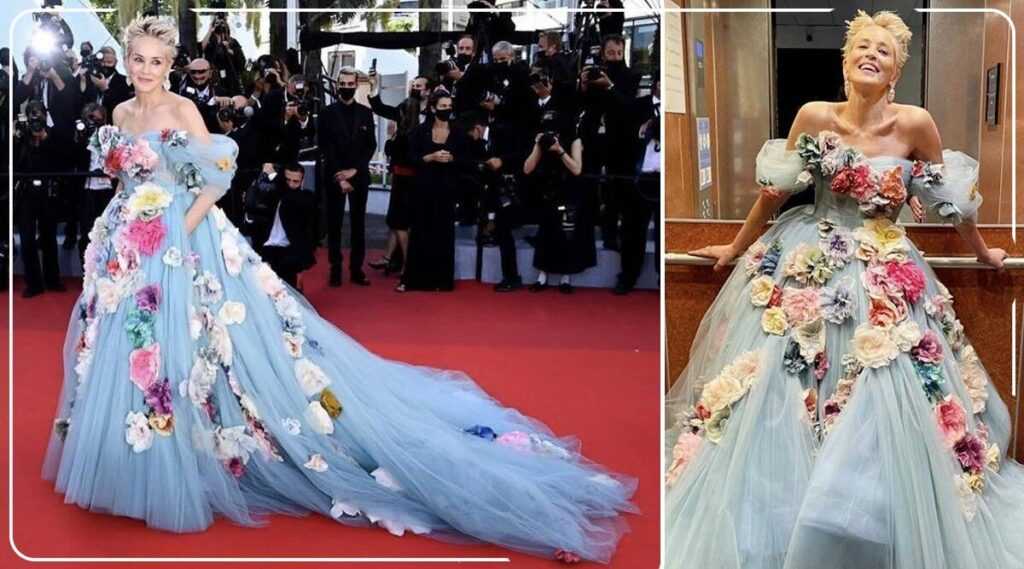
Going through my photo archive, I also found a photo of Sharon Stone a few days prior to saving my sketches. With florals on my brain, I was probably stalking Instagram for reference ideas and bookmarked the concept.
While game-planning the dress construction, I considered that my sparkly corset couture last year shed so many gems because I glued a vinyl bodice with 1,200 pieces, so this time around, I knew I’d have to hand stitch flowers— hundreds of them.
I wanted all roses at the time I sketched my look. I discovered sometime last year in Fabric Outlet (2109 Mission St.) a 3D floral fabric with rosettes on them, used most often via Amazon for tablecloths at wedding anniversaries and for photo backdrops.
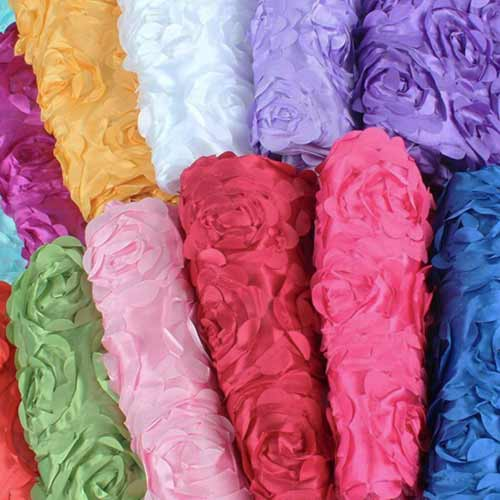
Initially I wondered if the dress could simply be this fabric, maybe layered with tulle underneath for volume. I still experimented with loose flowers to attach, ordering a set of fake roses just to play around and see. They were nice, but they had backings with hair clips. I took a break after that, talking to friends and meditating on the idea. Eventually the concept had morphed into a rainbow multicolored, but still color-blocked garden.
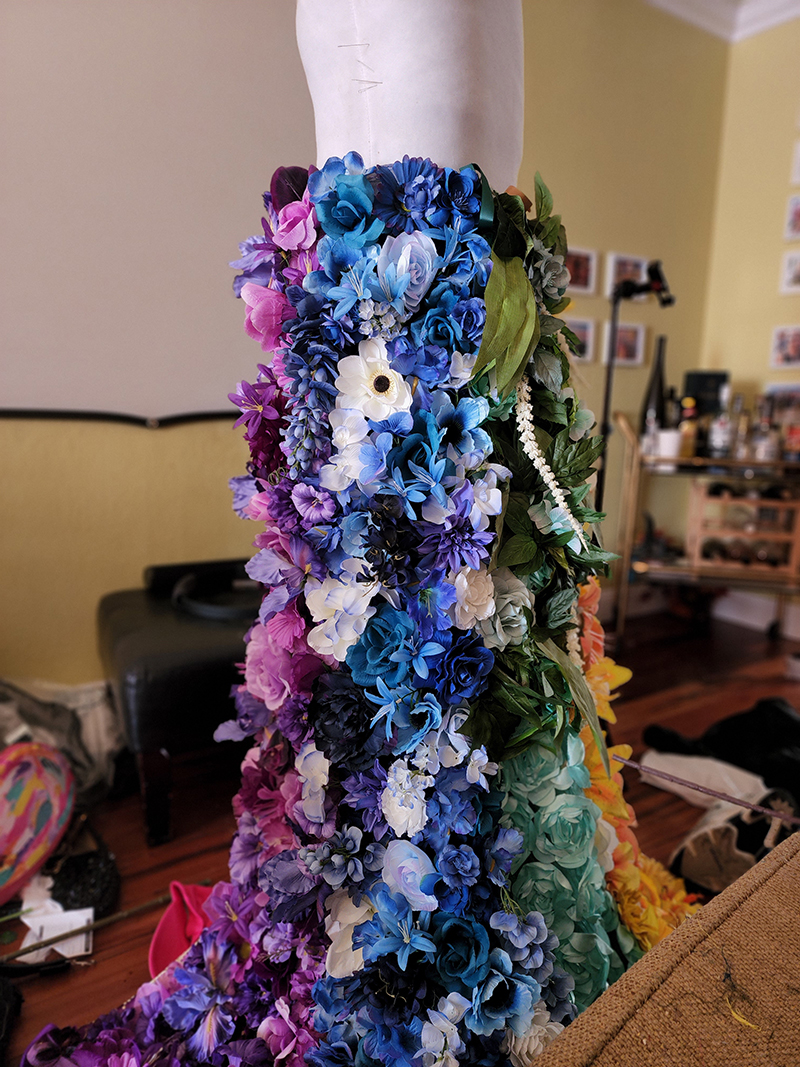
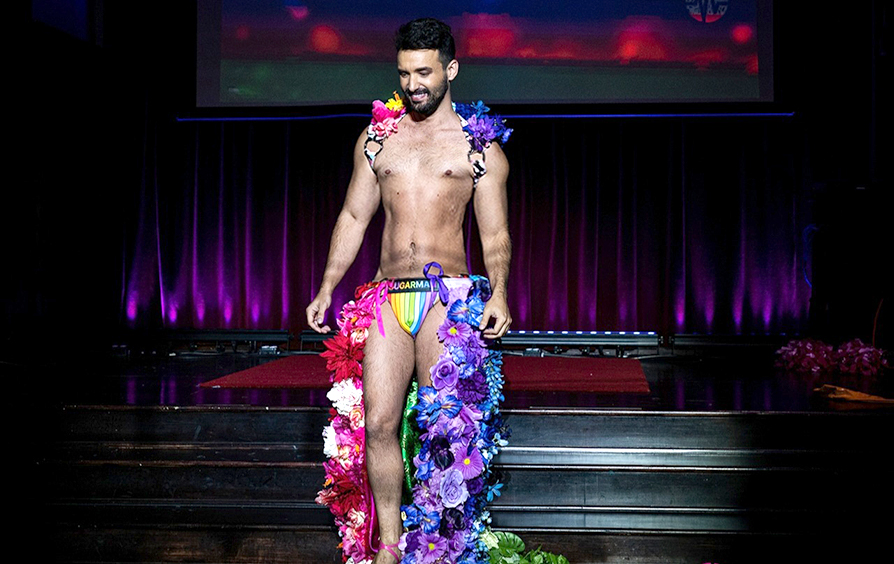
I bought the rosette fabric anyway and used it to blend any noticeable gaps between stitched flowers, making the entire panel resemble florals even after some pieces fell off. Below are the closest colors I could find to match the OG Pride flag— I conceptually eliminated orange and planned to blend it with yellow because I wanted this dress to be a little less literal. I also thought six panels of color would overwhelm an already very complex construction of five segments.
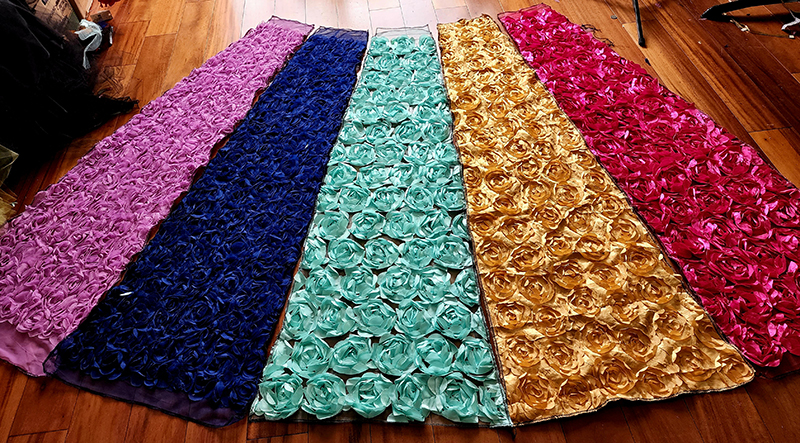
I’ve never made a proper circle skirt and never made a train, and I nearly flunked geometry in high school. There are lots of DIY tools and calculators out there to make the perfect skirt, but instead I simply measured my waist and hips, then calculated how much smaller that would need to be in order to open and display a rainbow jockstrap. I divided that measurement by five in order to make five panels and added seam allowance for each panel. Then, I knew I’d want the skirt to extend in volume at the floor, and this is where I used a little guesswork and just drew a panel into a triangular shape, such that it would make a semi-circle on the floor. Then I tried sewing the whole thing first in a muslin.
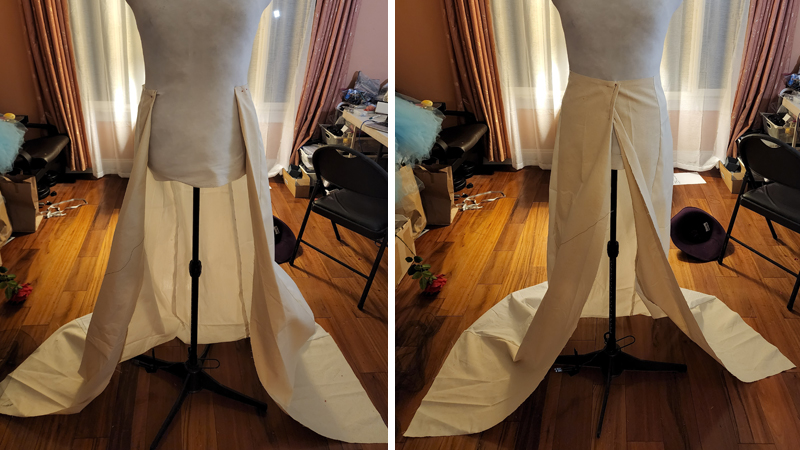
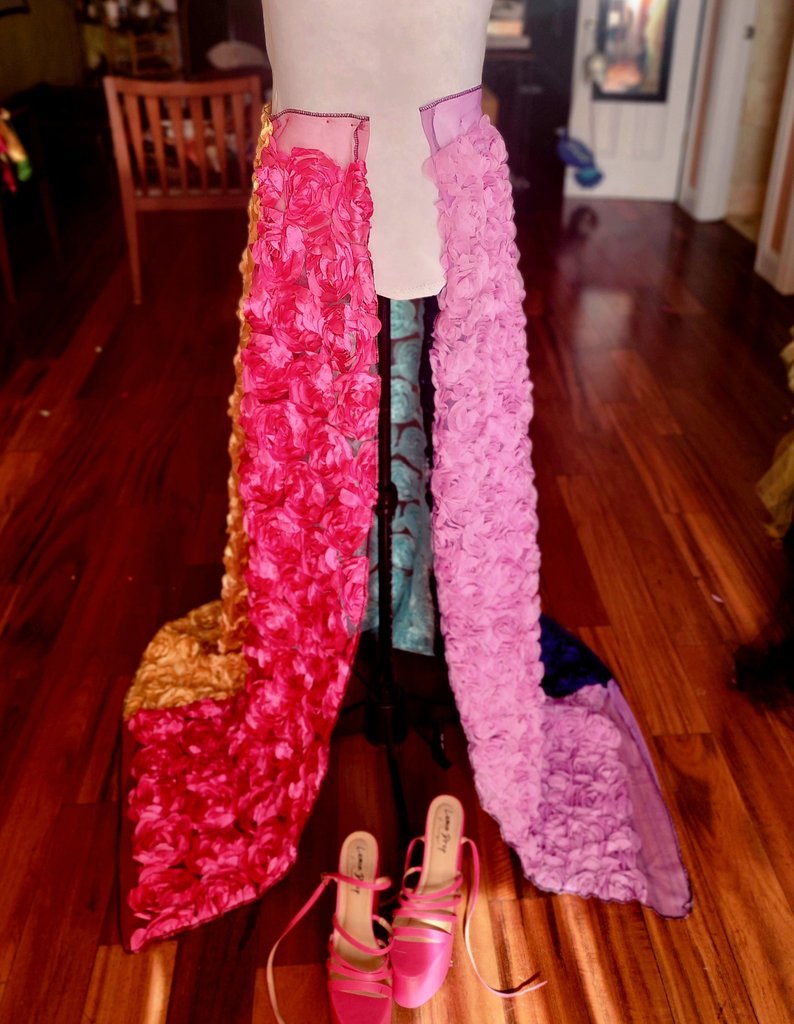
This worked out with very few alterations. I didn’t know yet whether the dress would hang from the jockstrap or remain open/closed at the high waist. I trimmed it down so the dress would open at the waist or hip, and then progressively shortened the muslin’s length so that it better matched the maximum length of the rosettes and the lining.
The lining choices at Fabric Outlet were also very pretty brocades, with different illustrations of florals and crucifixes; Not my first choice of drawing, but the colors were too pretty to pass up. I cut these in near identical shape as the rosette pieces, adding a little extra seam allowance so that the lining wouldn’t pull on the top layer, once attached.
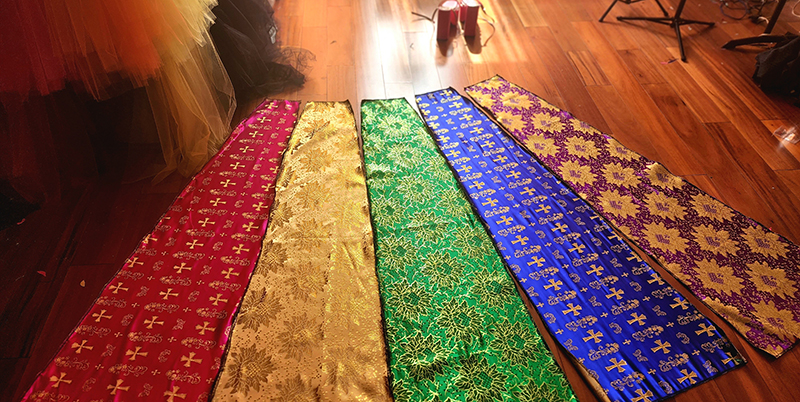
A number of challenges cropped up here, including doing a serge on both rosette and brocade fabric to prevent future fraying. I also created a huge pocket within the lining to hold all my things during Pride— I’ll spare you the nuance and just say that took several more hours than expected. The much bigger issue came when it was time to attach the lining to the top layer. The rosettes were all mounted on a 4-way stretch fabric. I did not buy them all at the same store, and one was actually a tablecloth from Amazon. So now I was going to attach them all to this non-stretch, but slippery woven fabric lining. Mostly it just meant a lot of pinning and a decent amount of seam ripping, and redoing.
I got tongue-tied how to make belt attachments here, too, because I didn’t know how the skirt would wrap around me. I ultimately built in a channel to slip a belt through the waist if I wanted to, and I also added ribbons at points along the waist, and at the base of the train in case I wanted to attach a cover to preserve it from places like Market St. ruining it.
Now we’re up to May 31: The base skirt is all done but no flowers are attached. Pride is a month away so there’s still plenty of time, right? The nonprofit Impulse SF had contacted me about closing a fashion show on June 16th. So now in addition to finishing the dress, the hood and the jockstrap, I have 11-12 other previously-made looks to zhuzh up and pull together for my very first runway collection. I also wanted to commission a couple things, make some jockstraps and a new disco helmet, all in just about 2 weeks.
I gave myself seven days to hand stitch, after spending a lot of May going to several dollar stores and many more trips to JoAnn and Michael’s. Every time I thought I had enough, I went back for more just in case. This was hundreds of dollars in flowers, so in that way it was easy to say yes to the fashion show because some money was involved. I wouldn’t profit, but it would lessen the blow on creating this hugely elaborate garment.
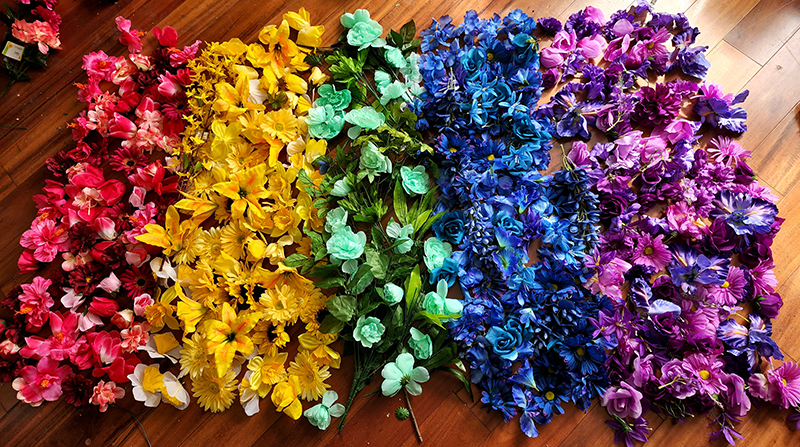
Not much to say about the hand-stitch process, even though it must be the most interesting part of this saga. It took forever and longer than I expected. I had no social life for at least a month in making this garment. It took me about a day and a half to stitch in each panel. I chipped a tooth while biting down on a needle in order to push it through the center of a yellow daisy. The green panel was also extraordinarily hard to game-plan and organize, as it was mostly plants. The first panel I did was purple, which was a surprisingly great move because of all its color variation. Upon completing it, I added a lot more hues of florals to the other panels than what’s shown above.
I should add though that by the end of it, this was definitely more of a skill than a chore. I started to understand why knitters found catharsis in their work. (It was a chore, too.)
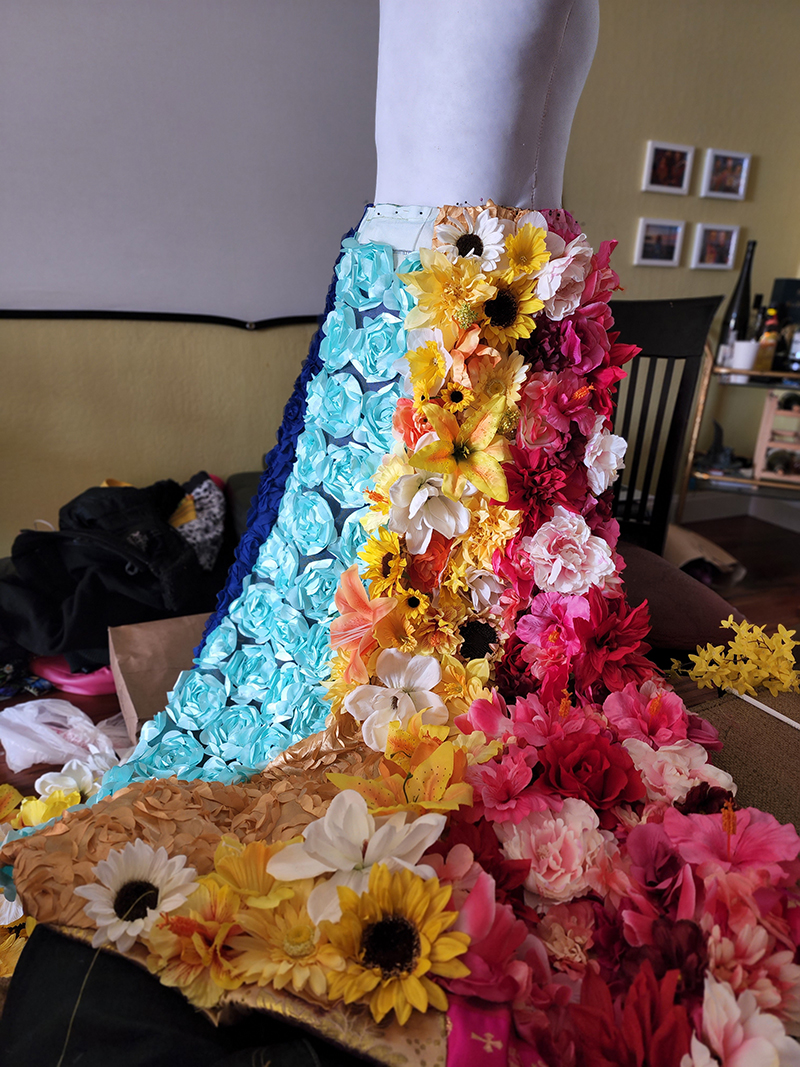
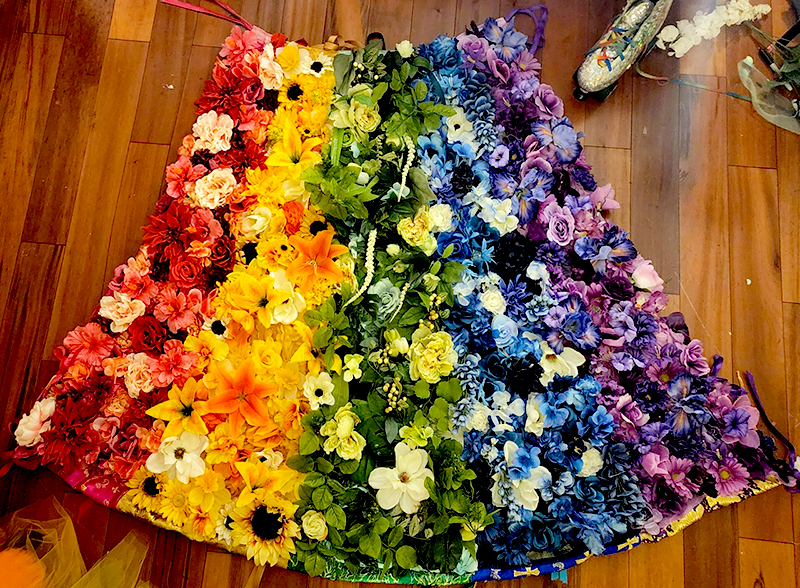
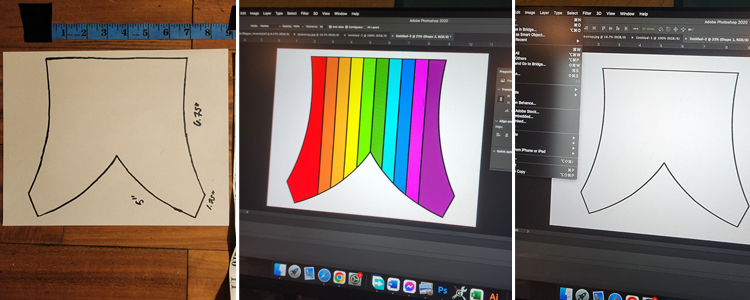
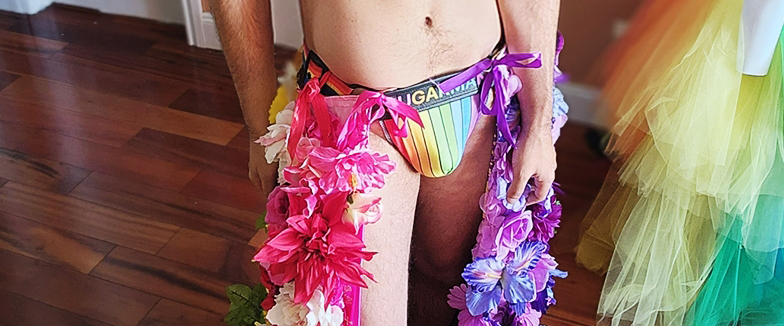
At this point it’s June 7th and I’m feeling pretty solid; Now it’s mostly down to the jockstrap and hood. For the jock, I had bought these basic solid-color ones off Amazon awhile back with a fit I enjoyed. The waistband was perfect. The butt straps could be a little tighter. And the crotch pouch I loved— I cut it off and spread it out, revealing a simple pattern with a dart at the inner thighs.
I traced around the fabric in black sharpie on printer paper. I photographed that tracing as a means of scanning it, and put that file in Adobe Illustrator. From there, I created smoother lines and angles, and then I designed a simple rainbow pattern that generally mirrored what I intended in the sketch.
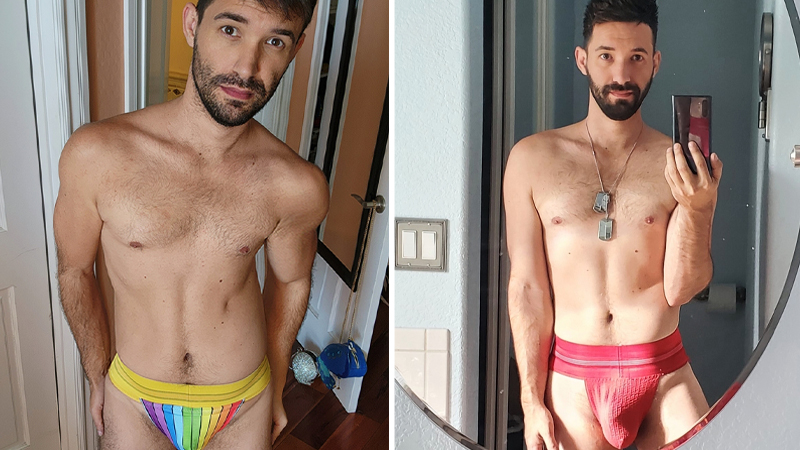
I have always wanted a “SUGARMAN”-branded set of undies, mostly because I feel the name lends itself to club boy franchise apparel akin to Marco Marco or Andrew Christian. In this instance, I considered that the jock itself could hold up this elaborate floral gown, provided the waistband was non-stretch. I designed a simple logo for this in pleather, mostly because I could always replace it with the genuine, more expensive fabric later provided that everything arrived in the right sizing scale.
All of this order I sent packaged in image files and sent along to Contrado, a London-based printing company I discovered in the pandemic that turns custom fabric around quickly. The results worked out great, although the crotch came out a little snugger than anticipated: In constructing the jockstrap, I doubled up jersey material to make sure I was a little demure on the runway and at Pride. In talking to an underwear designer later, he said doing this can eliminate a VPL we in the queer community often enjoy seeing.
The shoulder detailing was actually a hood, something I’ve made several times before for nightlife and Burning Man customers. I did not photograph this process extensively. Suffice to say I typically make these hoods with two side panels and a center stripe.
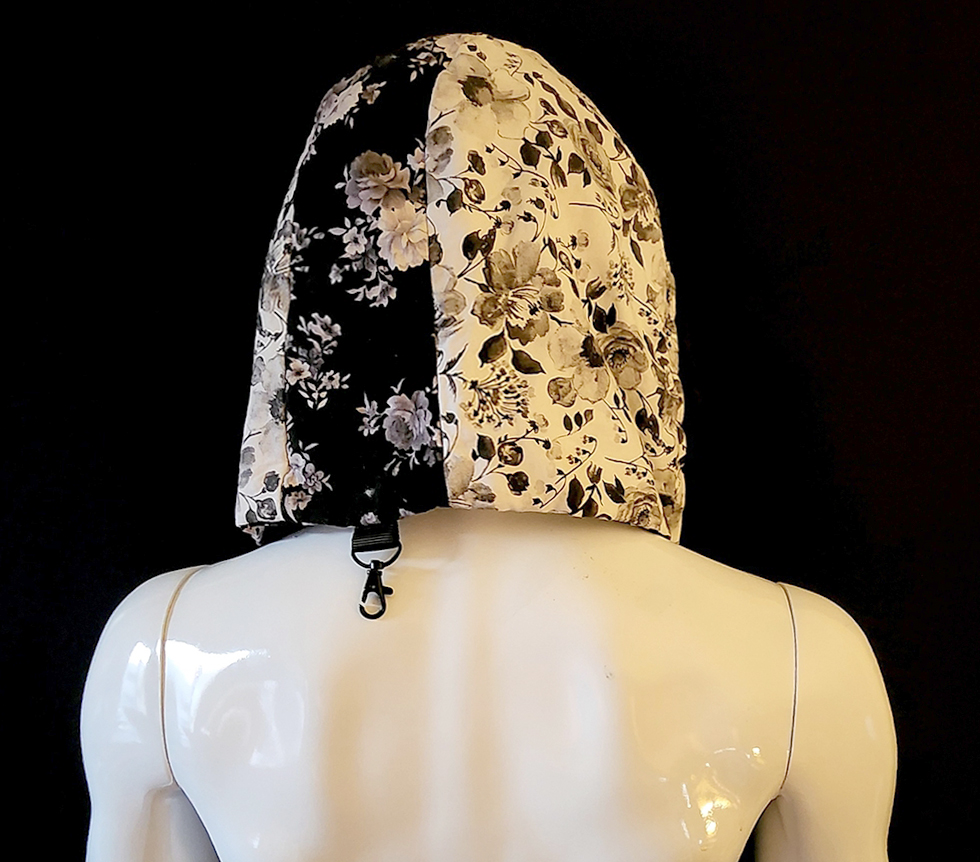
In order to mimic the Pride dress skirt—which is 5 panels—I split the hood’s side panels into two pieces each. So, two on each side and a single center stripe, as before. I made the hood and its lining both in the rosette fabric and then stitched in flowers where I knew they would appear along my shoulders and back. I meant to go back and finish the full hood in florals, but I have still yet to do that as of this writing.
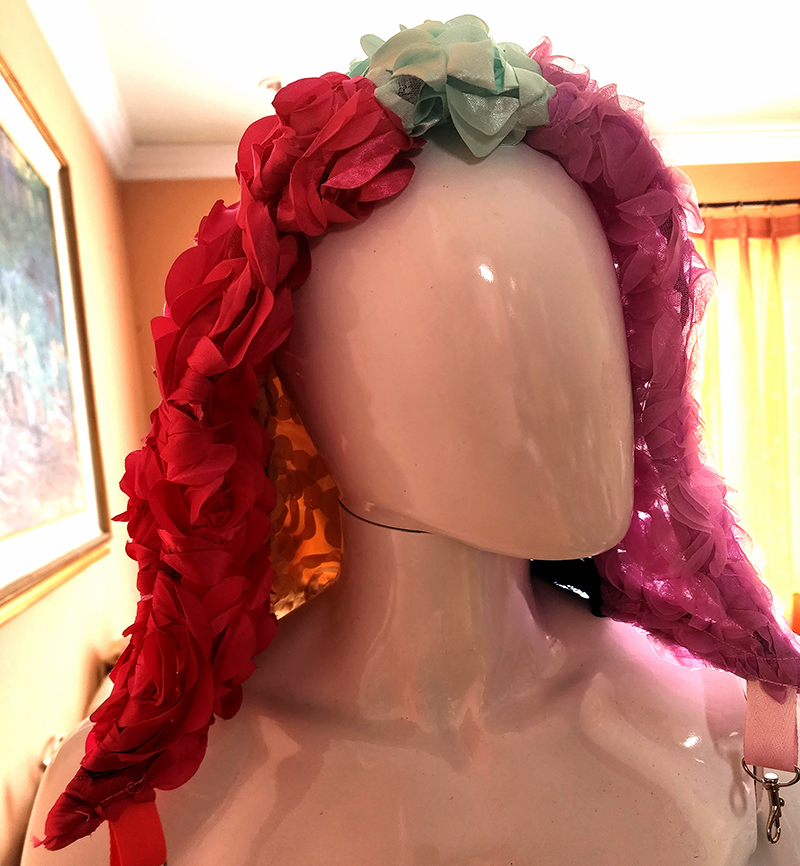
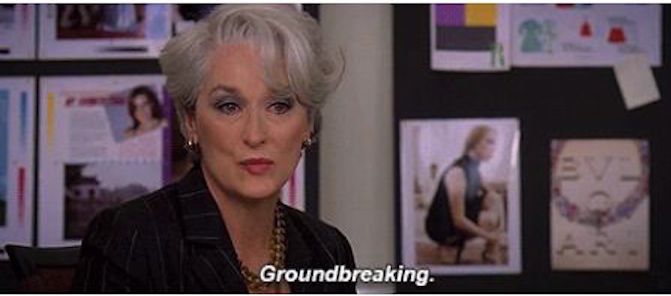
The garment sounds done at this point, but there was still the matter of attaching the hood to my body, such that the florals draped strategically. I had straps left over from my first floral harness, named aptly, “Florals? For Folsom? Groundbreaking.”
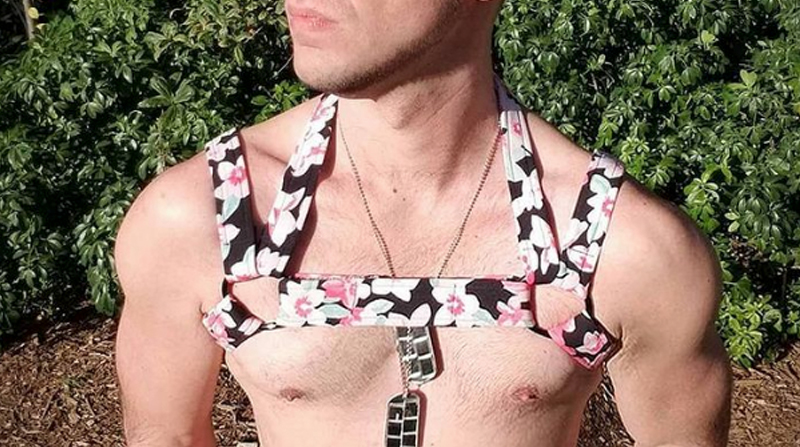
I reconstructed this into a harness but without the chest piece, attaching D rings that would serve as places for the hood to hook in.
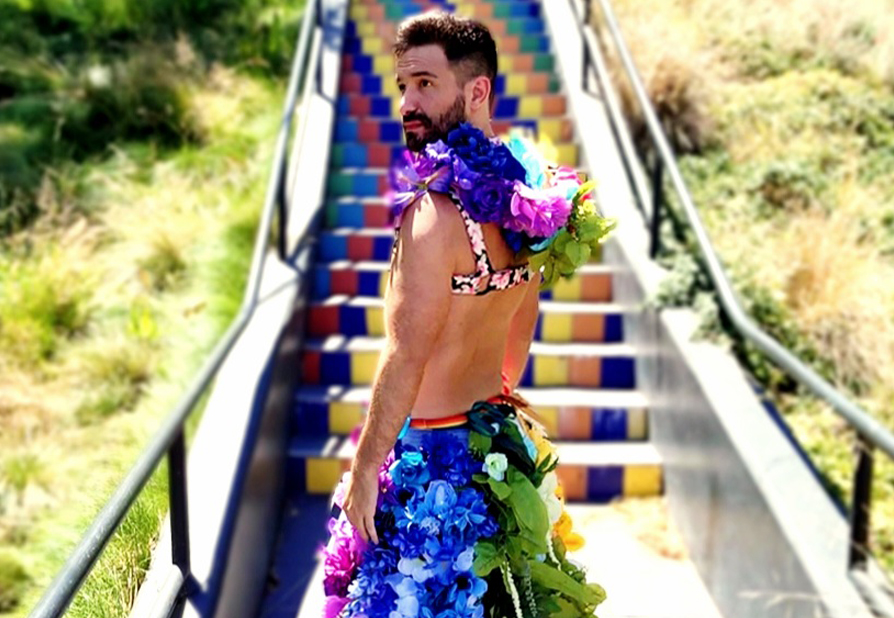
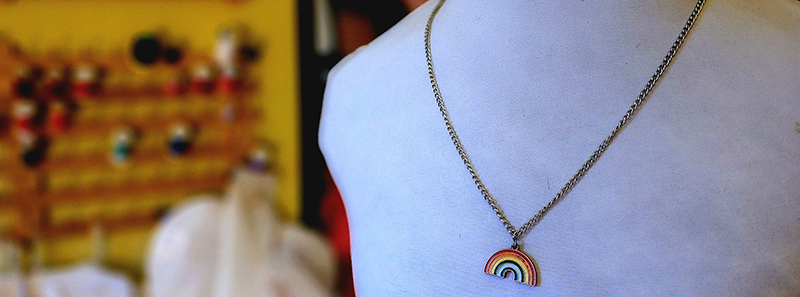
With all of that done, I accessorized the look with pink platforms I found online, and a rainbow pendant I crafted out of two bracelet charms that I had glued together at their backsides and attached to a necklace chain.
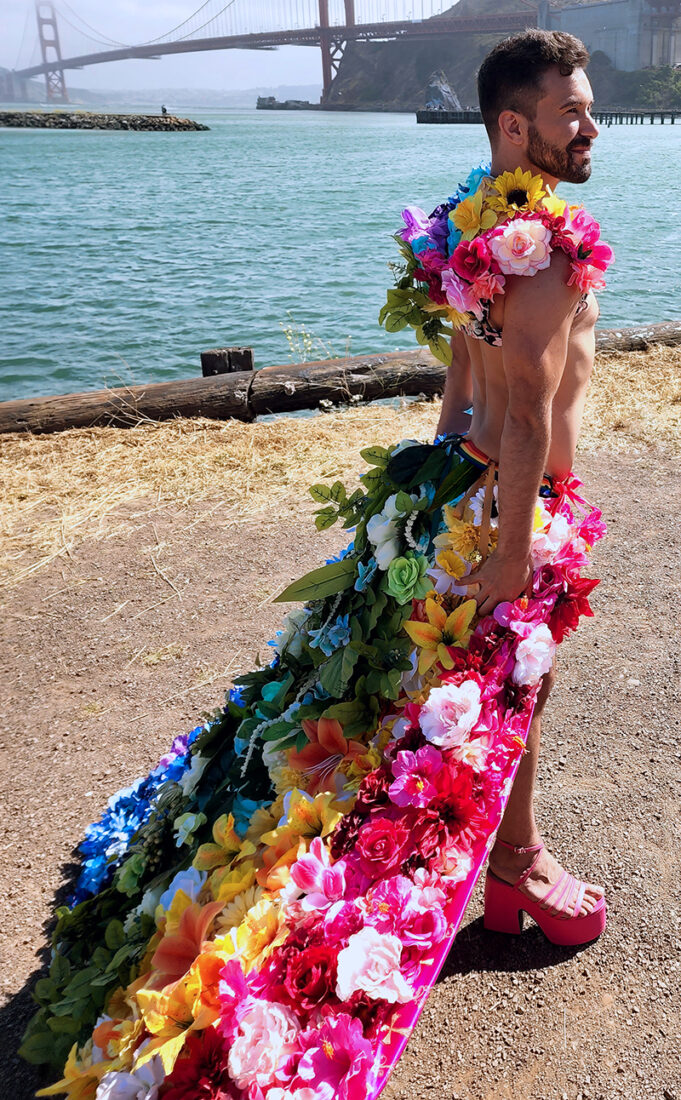
The results were undeniably spectacular. I told everyone I’d never make something so complicated again, but now of course ideas are already beginning to form. Fashion is a bug, and for me, it seems to be terminal.
This is part of a series called “How I Raved It” — Showing my process for making nightlife and other glitsy apparel pieces, and some nightlife adventures.
Support me on Patreon here.
Leave a Reply